| Sunstar | |
|---|---|
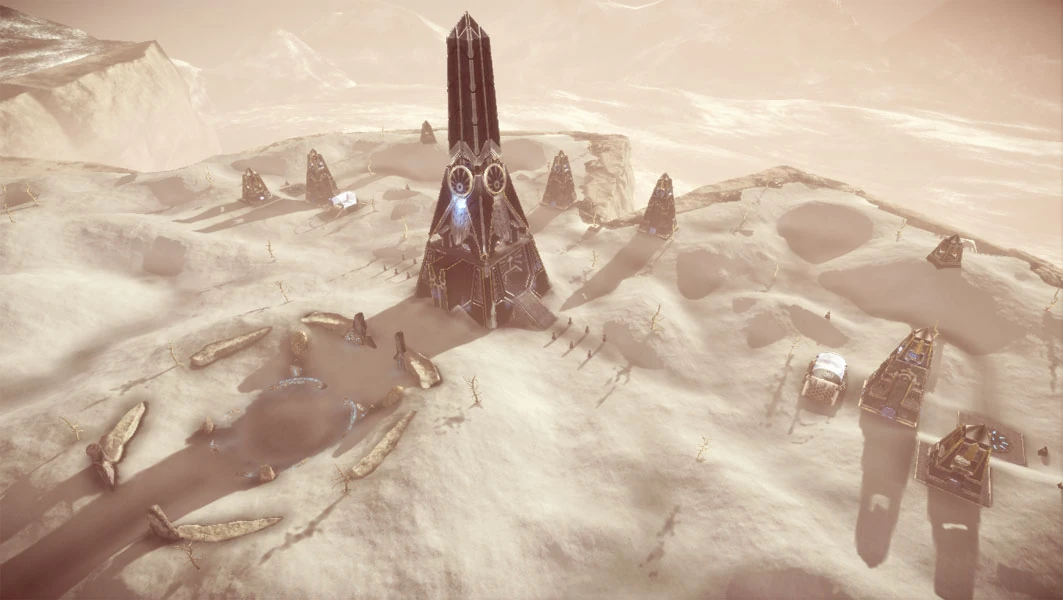 Click Image for Full Size | |
| Map Size | Small |
| Terrain Type | Desert |
| Remake? | No |
| Capture the Flag | Yes |
| Flag Exposure | Moderate |
| Gen Room Entrances | 2 |
| Base Turrets | 2 |
| Capture and Hold | No |
| CTF Blitz | {{{CTF Blitz}}} |
| Team Deathmatch | No |
| Arena | No |
| Rabbit | No |
Sunstar is a Capture the Flag map in Tribes: Ascend. It consists of many small towers surrounding a larger central tower on the side of a sandy canyon.
Terrain[]
The terrain on Sunstar is sandy with small hills. The tornados in the distance may indicate that this map takes place on the same world as Bella Omega. On one side is a deep canyon that players can fall into if they get too close; the other side has a neolithic-style arena or amphitheater. Each team controls three of the eight small towers, many of which have conduits (which allow free jetpacking within a limited space) to allow access to upper sections.
Bases[]
The team's flag stand is protected by a half-cylinder force field making it harder for cappers to line up their flag runs. This force field is powered by the Generator which is located underground between the two main towers of the base. Conduits allow access to the generator room, which means that players can simply drop down into it then jetpack back up no matter what armor they are wearing. The Vehicle Pad is located behind the main tower and the Radar Sensor is near it. Inventory Stations can be found at the bottom of the main tower, inside the small tower on the outskirts of the base, and in the second tower of the main base. There is a Base Turret guarding the right side of the flag stand (facing out).
Offense[]
Flag Routes[]
The shortest way is straight through the middle, but the route is exposed to Juggernauts and Sentinels.
Generator[]
You should use the Raider for an assault or Infiltrator for stealth; with multiple entrances, it is effective for either. Mortars cannot reach the generators easily and will have a high probability of missing (not 100%), but a Brute will be dangerous to the generator. A good tip is: Do not waste energy on you shield pack until the defenders get in the generator room.
Defense[]
Flag Defense[]
Initially the flag is protected by a force field. This means early cappers have to approach from the sides and a quick Doombringer can deploy additional force fields to nearly wall-in the flag. This will help make defense easier short-term, however if the generator is destroyed the flag will still be very exposed. On this map it's easy to see cappers coming a long way off, so Sentinels are very helpful on defense. Doombringer's Chaingun and Saber Launcher can be good weapons here. Using the Super Heavy perk (maxed out) is helpful, but as always it's hard to stay in one place with the force field down. If it is down, try laying mines near the edges of the flag stand and aim to take out cappers before they reach the flag.
Doombringer[]
You need to be HoF at all times, especially if the main Force Field is down. When the generator is online you can use deployable Force Fields to cover a lot of the open sides and place mines on the rest of the stand. Chain Gun is the ideal weapon for you on this map, but be ready to switch to Saber Launcher if a Shrike shows up; you can target them from almost the whole map because it's so small.
Technician[]
Place turrets on the sides of the ramps on either end of the flag stand. Put a motion sensor between the flag and the main force field on both sides to drain cappers energy and make their escape that much harder. When possible call in a Supply Drop for you and any Doombringers to re-arm. If the generator is out and you're not repairing it you can stand above the flag and use the Thumper to blast cappers as they hit the flag.
Sentinel[]
Claymores are great if the force field is on, but will be mortared when it's out. Hiding a Drop Jammer in between the flag stand and the tower will help with Infiltrators coming to disrupt the defenses. Of course the best thing you can do however is to snipe cappers coming in or escaping with the flag. This map is small enough that you should have a lot of time for clean shots, especially from the side towers of the base.
Generator Defense[]
The generator room on this map has no good choke points and is therefore difficult to defend. The easiest way is to kill attackers as they land in the conduit, using mines, claymores and turrets. Force fields can be deployed here too so that enemy players fall into them on the way down. Unfortunately many players will fire an explosive weapon down the conduit to clear out these defenses. Turrets near the edges of the room or by the generator itself can often survive long enough to get a few good shots in. Mines can also be placed at the end of the bridge to surprise Infiltrators when they come in to toss their sticky grenades. Doombringer's can deploy force fields to absorb some damage before enemies hit the generator, but the best defense is someone stationed in the gen room at all times.
Doombringer[]
On this map your time would be better spend on flag defense, but if that's covered then a few mines down here are useful. Put a force field right in the middle of the conduits to catch enemies as they drop in; the glow will help hide them and they will survive weapons fired down when mines won't. Instead place mines off to the side under the arch-ways where they will be slightly hidden from enemies.
Technician[]
Place a Motion Sensor outside the conduit circle where it will be less likely to be shot from above; remember that the glow will help hide it until enemies are closer. Put turrets where they can see one conduit and as much of the rest of the area as possible. Turrets have more range than you think, so let them see a long way. Place another sesnor on the edge of the circle platform opposite the generator to help with Infiltrators who sneak in close.
Video Guides[]
Sunstar Overview by HDGameSphere
Flag Route: Center Tower by LoreSung
Flag Route: Back to Front by TheSmallKiwiBird
Flag Route: Side 2 Side by TheSmallKiwiBird